Browse the internet anonymously with Whonix.
Use the easy step by step instructions in my video to install and configure Whonix OS on Windows 10 on VirtualBox.
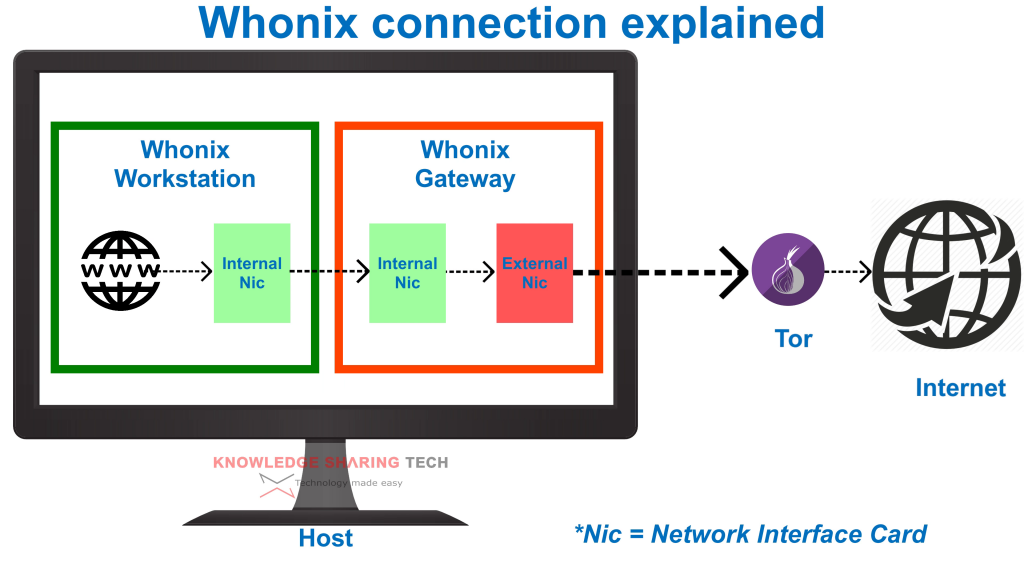
I also provide a detailed animated explanation on how Whonix works. Below is a snapshot of this animation.

Note: Both GW and WS should be running to browse the internet Always use the WS to browse the internet and never the GW
Commands:
To update Whonix OS on both the Gateway and on the Workstation perform the following on each:
- sudo apt-get update
sudo apt-get dist-upgrade
To change the passwords on both the Gateway and on the Workstation perform the following on each:
- sudo passwd root
- sudo passwd user
Chapters: How to install and configure Whonix on Windows 10 with VirtualBox
- 00:00 Intro
- 00:19 How Whonix works
- 01:00 Step 1: Download Whonix OVA and VirtualBox
- 02:28 Step 2: Install VirtualBox and import Whonix OVA
- 04:19 Step 3: Increase the RAM of the GW
- 04:51 Step 4: Initial configuration and update
- 08:34 Changing the default passwords of user and root
- 09:56 Step 5: Testing the internet connection
Disclaimer: Use the instructions in this video at your own risk. We are not responsible for any data loss or other damages that may occur


0 Comments